How to Create Windows Forms in C#
CodeGuru content and product recommendations are editorially independent. We may make money when you click on links to our partners. Learn More.
Most published C# books and tutorials illustrate C# programming concepts with console applications. However, console applications have very limited use in writing practical Windows applications. It is more fun to learn C# with Windows Forms or Windows Presentation Foundation (WPF). I have chosen to use Windows Forms for these tutorials because the development process with WPF is considerably more complex – it involves other .NET technologies not directly related to C# programming (for example, XAML).
I will first demonstrate how to build a very basic Windows Forms application. Then, in Advanced Introduction to C# with Windows Forms – Part 2, I will show you how to build a Windows Forms application that illustrates rudimentary string operations.
Prerequisites
This advanced tutorial is not intended as an introductory programming tutorial. There are many good C# books and on-line resources that you can read in parallel with this tutorial. In the reference section you will find several most popular C# tutorials and free C# books, as well as the development software you will need to work on these projects.
Creating a Basic Windows Forms Application
- To create a Windows Forms Application project, on the menu bar, select File, New, Project.
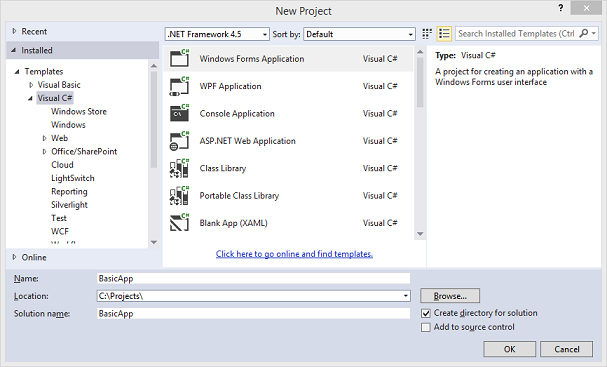
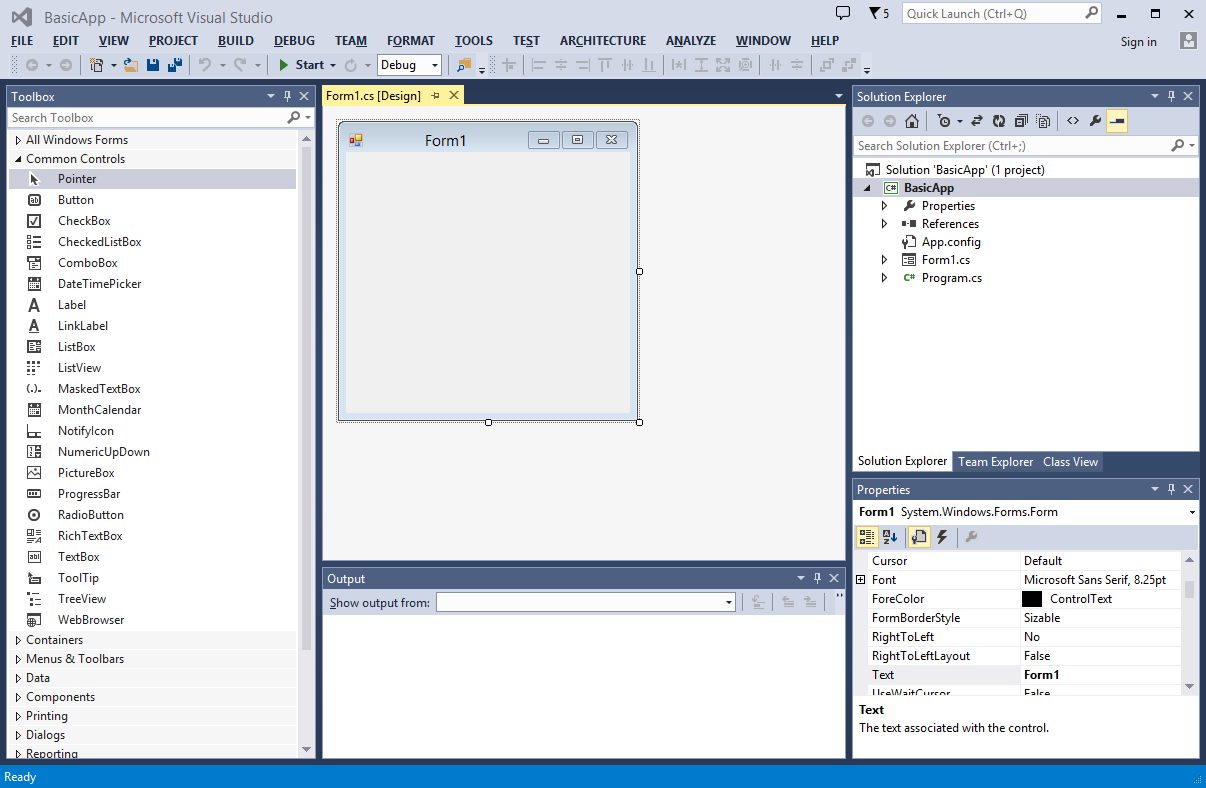
- Select Visual C# in the Installed Templates list. In the templates list, choose the Windows Forms Application icon. Name the new project BasicApp, and then click the OK button. Visual Studio creates a solution for your project. The following screenshot shows what you should see:
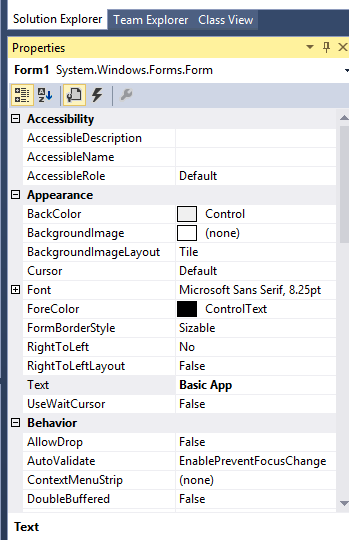
- Change the title of the Windows Form by clicking on the form to select it. In the Properties window, select the text “Form1,” and type Basic App, press Enter. You observe that the text at the top of your Windows Form has changed to Basic App.
- Add a button. From the Toolbox, in the Common Controls category, drag a Button control to the Windows Form. Change the Text property to GO instead of button1.
- Add a label. From the Toolbox, in the Common Controls category, drag a Label control to the Windows Form. Change the Text property to What is your name? instead of label1.
- Add a text box. From the Toolbox, in the Common Controls category, drag a TextBox control to the Windows Form.
- Add an event handler for the Button control. Double-click the button, and you will observe the code for your project:
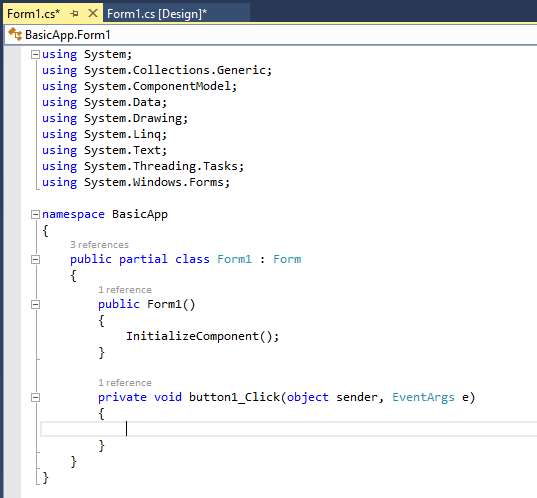
- This is the event handler for the button click event when the user clicks the button:
private void button1_Click(object sender, EventArgs e)
private void button1_Click(object sender, EventArgs e)
 <
label1.Text = "I see, your name is " + textBox1.Text + ".";
>

Build and run the program. Press F5 (or Control-F5) to build and run the program. The Windows Form is displayed on the screen. Click the GO button. It then displays the following:
You can download, build and run this application from: Source code
References
Development Tools
On your development system, you need to install Visual Studio Express 2013 for Windows Desktop from this link: http://www.visualstudio.com/en-US/products/visual-studio-express-vs If you have access to any other Visual Studio edition, such as Visual Studio Professional, you can certainly use it as well.
Popular Tutorials
- C# Fundamentals: Development for Absolute Beginners
- Programming C# Jump Start
- C# Station
- C# tutorial
- Microsoft Visual C# .NET Course
Free C# Books
- C# Yellow Book
- C# Essentials
- C# Programming for Beginners
- Fundamentals of Computer Programming with C#
Download
